| USING BEAM ELEMENTS TO MODEL BENDING MOMENTS
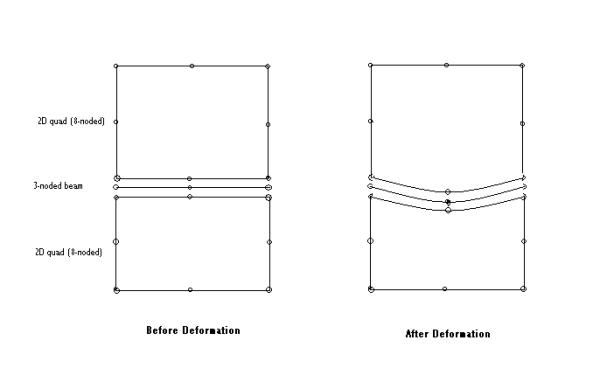
How do I create beam elements? When do I use 2-noded beam elements as opposed to 3-noded elements? If the element representing the beam is meant to be embedded between the two adjacent 2D elements, then it would have to be a 3-noded beam. This would insure that the mid-side node of the beam is the same node as the mid-side nodes of the two adjacent 2D elements as can be seen in the image below: |
 |
|
If the beam is to represent a strut (or tie) connecting two points, then a 2-noded beam would be appropriate. For example you might wish to fix a wall against a fixed point on the boundary in which case a single 2-noded beam would be sufficient. You must avoid using a 3-noded beam if it is not embedded in soil (or between two 2D elements) as the unrestrained mid-side node of the beam would create ill-conditioning in the stiffness causing the program to stop. How do I fix a beam into a wall made of 2D elements? If you wish to make your beam fully fixed to a wall created with 2D elements, then you must extend your beam so that it is embedded into the wall as shown:
Remember that connecting the prop to a node on the wall would create a pin-joint connection rather than a full fixity. This is because 2D elements do not have rotational degrees of freedom. Amir |